The internet has changed everything and it’s not going to stop anytime soon. The world of eCommerce is growing at a fast pace and there are so many opportunities out there that we can take advantage of.
However, the process of starting your own online store isn’t as easy as you might think. It takes time, effort, money, and most importantly, patience.
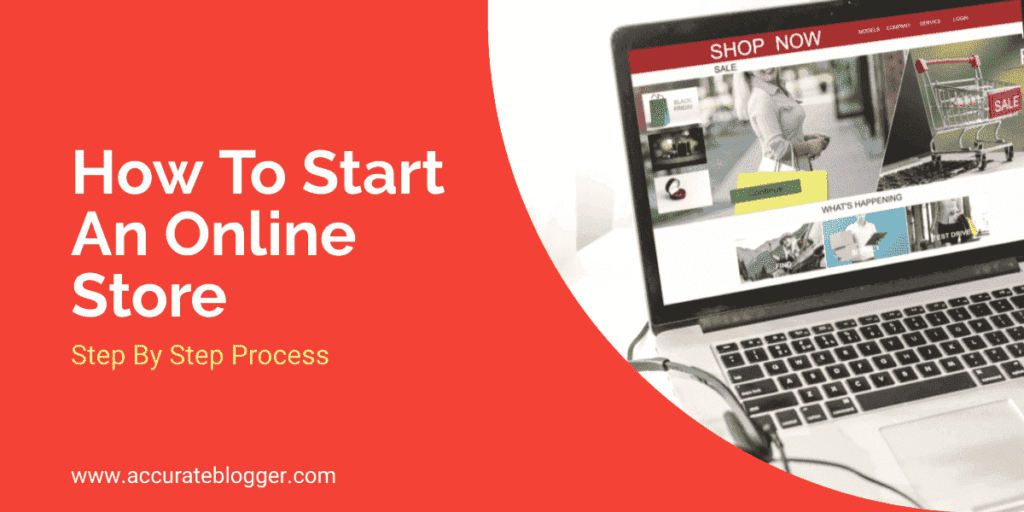
If you want to start an online store but don’t know how to do it, then this post will help you get started on the right foot. We have created a step-by-step guide for anyone who wants to learn how to start their very own online store.
Furthermore, this article will also give you some tips on how to make sure your business grows and becomes successful over time.
So without much ado, let’s get started!
- What is eCommerce?
- What are the Benefits of Setting up an eCommerce Online Store?
- What You'll Need to Build an eCommerce Store?
- How To Start an eCommerce Store – A Complete Step-by-Step Blueprint
- Promoting Your Online Store (Bonus Tips)
- FAQ On How to Build eCommerce Website
- Final Conclusion – How to Start an eCommerce Website
What is eCommerce?
eCommerce, also known as electronic commerce or online commerce, refers to the buying and selling of goods or services using the internet, and the transfer of money and data to execute these transactions.
eCommerce is often used to refer to the sale of physical products online, but it can also encompass services, digital products, and even offline sales.
This can include anything from buying clothes online, ordering food from a restaurant, or booking a hotel room. eCommerce is convenient for both buyers and sellers, as it allows for 24/7 shopping and eliminates the need for a physical store.
Additionally, it provides customers with more options than ever before, allowing them to shop around the clock and choose from thousands of items.
It also helps businesses grow because they no longer need to be physically located near their clients. They can now sell their products anywhere in the world, which means they can reach a wider audience.
What are the Benefits of Setting up an eCommerce Online Store?
The eCommerce industry has become very popular over the years. In fact, according to Statista, global sales from eCommerce reached $5.5 trillion in 2023 and this figure is expected to increase by 50% over the next few years, reaching about $7.4 trillion by 2025.
This means that if you have a great idea for an online store, you could be making millions of dollars within a short period of time.
However, there are thousands of marketplaces available, including Amazon, Etsy, and Facebook Marketplace, which allow you to use their platform to sell your products.
These marketplaces provide a larger client pool for businesses, which means that businesses don’t need to fight for finding customers who will buy their products.
But why do you need to start an online store, if there are so many marketplace options out there?
The answer lies in the benefits of starting an online store. Here are five reasons why you should consider starting one:
1. Full Control over Site Functions, Designs, and Navigation
When you build an online store yourself, you gain full control over all aspects of your site. You can change anything you want, such as the layout, navigation, fonts, colors, images, etc.
You can even create custom designs for each page of your site, allowing you to make your site look exactly like what you envision it to look like.
As a result, when people visit your site, they won’t feel lost because they know exactly how to navigate through your pages. This makes your visitors more likely to stay on your site longer and spend more time browsing around.
2. Avoid Expensive Processing Fees
One of the biggest drawbacks of using third-party platforms is that they charge hefty fees for processing payments on every transaction.
If you decide to set up your own online store, however, you will not incur any additional costs. All transactions will be handled directly by you, meaning that you will only pay for the services you actually use. For instance, if you use Stripe or PayPal to process transactions, you will only pay for services that are much cheaper than those offered by marketplaces.
In short, setting up your own online store is significantly less expensive than using other marketplaces.
3. Build Your Own Brand Recognition
Another benefit of building your own online store is that you can build your brand recognition. When you launch your website, you will instantly have a presence on the internet. People will see your logo, name, and contact information right away.
And since you’re the one handling the entire process, you can also customize your branding to match your business image.
For example, you can add a unique logo, color scheme, and font style to your site. These elements will help you stand out among competitors and attract new clients.
4. Cross-Sell and Upsell
Setting up your own online store allows you to cross-sell and upsell your products. If someone buys something from you, you can offer them another product at a discounted price.
This way, you’ll earn some extra money without having to invest too much effort into selling your products.
But in marketplaces, this kind of thing isn’t possible. They only allow sellers to sell their products. So if someone purchases something from you, you cannot offer them another product.
5. Full Control over Sales & Promotions
Finally, when you set up your own online shop, you get complete control over sales and promotions.
You can choose which products to promote based on your target audience’s interests. And you can adjust prices accordingly.
Additionally, you can easily track conversions and analyze data to determine which marketing strategies work best for your business.
In short, when you start your own online store, you’ll enjoy many benefits that you wouldn’t find with marketplaces.
6. Full Access to Customer Data
Unlike marketplaces, where customer data is stored in databases owned by third parties, your own online store gives you full access to all customer data.
So you can keep tabs on your customers’ behavior and preferences. You can also send targeted emails to your existing customers, offering discounts and special deals.
Additionally, you can collect valuable feedback about your products and services. This will help you improve your offerings and increase your chances of success.
As you can see, there are several reasons why you should consider starting your own online store instead of using marketplaces.
What You’ll Need to Build an eCommerce Store?
There are several ways to get started with an eCommerce business but the most popular method is by using WordPress as your platform. It’s free, easy to use, and has thousands of plugins available to help you grow your business.
Another good thing about WordPress is that you don’t need to hire any developer or designer to set up your eCommerce website.
If you have a domain name and hosting already paid for, you can simply go ahead and start setting up your new online store right away. However, if you don’t have these things yet, you will need to purchase them separately.
Here are the basic requirements:
- Domain Name – A unique web address that identifies your online store i.e mystore.com
- Hosting – A place where your website files live (i.e. www.mystore.com)
- WordPress – An open source CMS (content management system) that allows you to easily update and manage your website
- WooCommerce Theme – A theme designed specifically for WooCommerce stores
That’s it!
Are you ready to start selling online? We’ve put together a list of everything you’ll need to get started, and in the next hour, you can have your own online store up and running. Just follow our step-by-step guide below.
So without much ado, let’s get started!
How To Start an eCommerce Store – A Complete Step-by-Step Blueprint
Setting up an eCommerce website is easier than you might think! You don’t have to go through a long and expensive process to set up an online store.
In fact, there is a much easier way to get started. We have outlined a 6 step process that can be followed to start your very own eCommerce website in just a few minutes.
In this section, we will walk you through each step of this process and give you a detailed explanation for each step. After reading our instructions and following our recommendations, you should have no trouble setting up your first eCommerce store in no time.
So let’s begin!
Step 1: Start With Niche Research
Before you even think about starting an online store, you need to decide what type of products or services you want to sell.
You should try to identify a niche market that you can target. If you do this correctly, you will stand out from other competitors who may be offering similar products or services.
Think about what you like and dislike about certain products or services. For example, if you hate shopping at malls, then maybe you could create an online store that sells only items that people buy at home.
Or perhaps you love buying clothes online so you could start an online clothing store.
Once you have decided on a niche market, you need to find something that you can offer your customers that no one else offers. This is called differentiation.
For example, if your niche market is men’s fashion, you would need to come up with products or services that are exclusive to your niche.
If your niche market is women’s fashion, you would probably need to differentiate yourself by coming up with a product that appealed to women.
In addition to that, you should also make sure your products are something your potential customers would actually enjoy.
Apart from that, you should also ensure that your business model is unique compared to others in your niche. You should avoid copying existing businesses as this will just lead to failure.
Also, you should consider whether your niche market is big enough to support your business. If you plan to sell high-end products, you might need to focus on a niche market that has a large customer base.
On the other hand, if you plan to sell low-cost products, you might need a niche market that has less competition.
Now that you have decided on a specific niche market, you need some research tools to help you narrow down which products or services you should focus on.
One of the best ways to do this is to look at Google Trends.
Google Trends allows you to search for keywords related to your niche market and it will show you how often those keywords are searched.
In addition, you can use Semrush (one of the most popular SEO tools) to see which websites are ranking well for these keywords and which keywords are most profitable for your business.
This way, you’ll get a better idea of which products or services you could potentially sell.
Step 2: Selecting CMS Platform
After deciding on a niche market and narrowing down your list of possible products or services, you now need to choose a content management system (CMS).
Choosing the right CMS platform is important because it determines how easy it will be for you to manage your website once you launch it.
There are many different types of CMS platforms available today, but here we’re going to discuss the two most popular ones:
- Shopify
- WordPress
We’ve chosen Shopify and WordPress because they both provide great features and are very user-friendly.
Shopify is a premium e-commerce platform that helps businesses of all sizes run their online stores. It offers a wide range of features at a variety of price points, making it a great option for businesses of all sizes.

The basic plan starts at $29 per month and comes with all the essential features you need to run a successful online store.
For businesses that need more advanced features, they offer two additional plans that cost $79 and $299 per month, respectively. No matter what your budget or needs are, Shopify has a plan that will help you succeed in the world of e-commerce.
As we said above, it’s a premium tool so you won’t be able to create a fully functional store unless you pay for its monthly subscription.
Furthermore, you will have to pay additional fees for Shopify Payment Solutions cost 2.9% + 30 cents per transaction.
We agree, that Shopify is one of the great platforms for creating an online store. But in the initial stages of your business, you don’t need to spend money on something that you don’t really need yet.
On the other hand, if we talk about WordPress, it’s one of the most widely used content management systems (CMS) in the world. It’s free and open-source software that anyone can install on their own hosting server.
By using WooCommerce (a free open-source WordPress eCommerce plugin), you can easily set up an online shop without having any technical knowledge.

It also provides you with a lot of customization options and plugins that allow you to add extra functionality to your site.
You don’t need any special skills to get started with WordPress. All you need is a domain, an SSL certificate, a web host, and a WooCommerce theme. After that, you can start building your online store from scratch.
As mentioned earlier, a domain represents your brand name and the URL of your website, for example, www.mywebsite.com.
An SSL certificate ensures that your customers know that you’re legitimate and trustworthy.
A web host is where your website files are stored. You can use either shared or dedicated servers depending on your needs.
Finally, a WooCommerce theme is a template that gives your store a unique look and feel. There are thousands of themes available, but we recommend only the Astra WordPress theme as they are highly customizable and feature-rich.
In the next section, we’ll be covering all the steps you need to take in order to get your WooCommerce store up and running – including choosing a domain, hosting, SSL certificate, and theme. So be sure to follow along!
Step 3: Select a Domain Name, Hosting, and WooCommerce Theme
As we have selected WordPress as our CMS, now the next step towards launching your online store is selecting a domain name, SSL, hosting, and a WooCommerce template.
To provide you with better clarifications, we have divided this process into 4 separate sections. Let’s dive right in!
3.1 Pick a Domain Name for Your Brand
The domain name is the most important part of your website. It’s how people will find you online and it can be one of the first things that they see when they visit your site. If you don’t have a good domain name, then you are missing out on potential customers who may not even know what to search for in order to find you.
When picking a domain name, make sure that it reflects your brand identity and has a catchy keyword phrase. For example, if you sell organic food products, then “organicfoodstore.com” would probably work best. However, if you sell dog toys, then “dogtoystore.com” might be more appropriate.
There are many factors that go into choosing a perfect domain name. And, since it is such an important aspect of your online presence, it is essential that you spend enough time researching all these aspects before finalizing your choice.
The following tips will help you choose a domain name that is perfect for your business.
- Easy to spell – Make sure that the domain name is easy to spell and pronounce. This means that it shouldn’t contain numbers or symbols that are difficult to type or read.
- Keep it short – Keep the domain name short and sweet. A long domain name makes it harder for users to remember.
- Use keywords – Use keywords that describe your business. For example, if your business sells organic food, then you could register “organicfoodstore.com”.
- Avoid hyphens – You should always avoid using hyphens in your domain names. Hyphens are used to join words together and create compound words. But hyphens are often confused by browsers and search engines.
- Be memorable – When you’re looking for a domain name, try to come up with something that is both memorable and relevant to your business.
- Unique and brandable – Try to pick a domain name that is unique and brandable. This way, you can easily build your brand over time without having to change your domain name.
- Focus on Extention – The extension (.com,.org, etc.) is another factor that you should consider when choosing a domain name. So, choose it wisely.
When you have decided on the perfect domain name for your website or blog, you will need to purchase it from a domain registrar. There are many domain registrar options available online, so you can choose whichever one you prefer.
We recommend buying through NameCheap because they offer free domain privacy with each domain registration. If you buy a domain for a long-term period, they offer great discount rates as well.
Apart from that, the customer support team at NameCheap is very responsive and helpful, which is why we highly recommend them.
Quick Note – There are many hosting providers that offer a free domain for the first year, but it’s important to keep in mind that the renewal price after the first year can be quite expensive. So, if you’re looking for a long-term discount on your domain, it’s best to buy it separately from Namecheap. Otherwise, a free domain for the first year may be the better option for you.
3.2 Choose a Web Hosting Service Provider
Once you have chosen a domain name, you will need to buy hosting services. These days, there are plenty of web hosts that provide excellent service at affordable prices. We recommend Bluehost as their service is reliable and offers lots of features.
Bluehost is one of the web’s most popular hosting providers and is recommended by WordPress itself. They offer reliable hosting services at an affordable price, making them a great option for beginners.
So let’s purchase your domain (optional) + hosting + SSL from Bluehost:
1. Click on this Exclusive Link to get a better hosting deal on Bluehost. By
2. Click on the “Get Started” button.

3. On the next screen, choose the plan that suits your needs and then click on the “Select” button.

4. On the next screen, you will be asked about your domain name. In case you already own a domain, you can enter its details there, otherwise, you can register a new one. Once you have done, click on the Next button.

5. After clicking on Next, you’ll be directed to the “Account Creation” page. Complete the account information details and scroll down.

6. In the next section, you will find two options: “Package Information” and “Package Extras”. As part of the Package Information section, you need to select the term of your hosting plan.

Important – If you’re looking to save money, always opt for a long-term plan. In the Package Extra Options section, you’ll be asked to choose additional hosting services and marketing tools, which will cost you extra. These are all optional services, so you can skip this option.

7. At the bottom, You will be asked for “Payment Information”. Payment can either be made by credit card or by PayPal. Once you’ve chosen your preferred payment method, click the Submit button.

Quick Note – Bluehost Offers free SSL certificates for websites. It also helps protect your visitors’ data while browsing your site. If you need more advanced security options, you can upgrade to a paid certificate.
Congratulations! You have successfully purchased your domain and hosting services from Bluehost. Now, you just need to install WordPress + WooCommerce on your hosting server to start building your store.
Recommended Read: Bluehost Review: Still the Best (or Not-So-Good) in 2023?
3.3 Choose the Best WooCommerce Theme
There are so many different themes available online today, with each having its own unique advantages and disadvantages. Some themes are easy to use, whereas others require a lot of technical knowledge to set up.
We’ve tested hundreds of themes over the years and found that the best ones are those that are simple yet powerful. That way, you won’t spend too much time trying to figure things out.
In addition, they should be visually appealing and easy to navigate. A good theme should make it easy for customers to shop without any hassle.
Here is our top pick for the best WooCommerce theme, which is Astra Pro. This theme has everything you need to build a successful eCommerce website with WordPress.
This theme is developed by the Brainstorm Force team, who has been working in the industry since 2009. They know what works and what doesn’t when it comes to creating a solid eCommerce platform.
Astra is a powerful WordPress theme that is perfect for businesses of all types. This is a free theme, which offers all essential eCommerce features. With Astra, you can easily set up an online store and start selling products or services.

However, there is an Astra pro plugin also available, that offers more advanced customization options to enhance the overall look of your eCommerce websites like dedicated sidebar options, infinite scroll, off-canvas sidebar, drop-down shopping cart, 2-step checkout, and many more.
If you’re looking to really make your store stand out from the crowd, the Astra pro plugin is definitely worth considering.
It’s all up to you whether you want to go with the free version or the premium one. Either way, you’ll get access to tons of useful tools and resources to help you create a stunning online store with WordPress.
If you decide to go with Astra pro, here is the Exclusive Link to get it for a discounted price.
Congrats, now you have got your brand domain name, reliable web hosting, and a fully customizable WooCommerce theme.
Next, you will need to install WordPress and the Astra theme on your WordPress account.
Step 4: WordPress Installation & Setup
Installing WordPress and the Astra WooCommerce theme is very straightforward. However, there are a few essential steps involved so make sure you follow the steps outlined below carefully.
4.1 WordPress Installation
For WordPress installation on your hosting server, all you need to do is follow these simple steps:
1. First of all, log in to your Bluehost Hosting Account.
2. Click on the “My Sites” tab from the left side menu.
3. On the next screen, click on the “Create Site” button from the top right side corner.

4. Next, you will be asked to create a new WordPress Website. Simply Enter your eCommerce store name and tagline. (of course, you can update it later).

There you will find one more option of “Advanced“, Simply click on that button.
On the next screen, you will be asked to fill out your WordPress account details. You need to enter your email id, username, and password, which you wish to use for your WordPress website. After filling up all the required information, click on the “Next” button.

5. Then, you will be asked to choose your domain name from the list. Simply select your domain name from the drop-down list and leave the Directory option empty. Bluehost will suggest you a few optional plugins for your WordPress site. You don’t need to install any plugin from there. Simply click on the “Next” button.

That’s it! Congratulations, you’ve successfully installed WordPress on your Bluehost hosting server.
4.2 Setting up WordPress
There are a few important settings you’ll need to configure for your WordPress website. These include your site title, tagline, timezone, and some others.
You can set these by logging into your WordPress admin panel and navigating to the “Settings” section. From there, you can configure your site’s title, tagline, and timezone. Be sure to click “Save Changes” when you’re done.

Pro Tip – If you’re starting a new WordPress site from scratch, one of the first things you should do is delete all the sample data and plugins. This will help you keep your site clean and organized. Plus, it will make it easier for you to add your own content and plugins later on.
Now, it’s time to install the Astra theme on your WordPress website.
Step 5: Installation of WordPress Theme and WooCommerce
Till now, we’ve only configured our WordPress website. Now, let’s start installing the Astra theme and WooCommerce plugin.
There are two ways to set up your online store with WordPress:
1) Using a Pre-Built Theme (Recommended)
2) Building from Scratch
We recommend using a pre-built theme because it saves time and effort. However, if you prefer building your own website, then you can follow this tutorial.
The Complete Guide to Setting up Online Store Using WordPress and WooCommerce in 2023
Let’s start with the first method.
Astra WordPress theme comes with pre-built eCommerce templates that are perfect for building online shops using WordPress and WooCommerce. These templates are designed to give your online shop a professional look and feel, and they are easy to customize to match your brand.
There are many free & premium pre-built eCommerce template options available with Astra that can suit the needs of any type of product or industry. These templates can save you time and money by providing a ready-made solution that can be customized to fit your specific needs.
The best part is here that, by using any pre-built eCommerce template, all the required plugins (like Woocommerce) and settings will be automatically added to your WordPress website. So, all you need to do is choose a template, add your content, and you’re ready to start selling!
In this post, we will be using the free version of the Astra theme with a pre-designed eCommerce template. So, let’s get started.
1. First of all, log in to your WordPress account. Either you can log in through the Bluehost dashboard or you can use this link – https://yourdomainname.com/wp-admin
2. Once you logged in, Click on Appearance » Themes on the left side menu bar.
3. Click on the “Add New” icon at the top left side of the screen.

4. On the next screen, you will see a page where you can find different themes listed. Search and find the Astra theme from the list and click on the “Install” button and after installation, click on Activate.

5. Once theme activation is complete, you will find a notice at the top of the WordPress dashboard. There you will be asked to install the “Starter Templates plugin”. Click on the “Get Started” button

6. After installation, you will be redirected to the “Starter Templates Library” dashboard. Here you will find an intro video on starter templates. This video is a great resource to help you get started with building your website. Once you have watched the video, click on the “Build Your Website Now” button to get started.

7. Next, you will be asked to select your preferred online store builder to optimize your eCommerce website with WordPress. There are three options available to you: Block Editor, Elementor, and Beaver Builder. We recommend using Elementor because it’s a very powerful and easy-to-use page builder.

8. Once you choose your preferred page builder, click on that. It will take you to the pre-built template library page, where you can browse hundreds of templates. To find eCommerce templates, click on the eCommerce tab.

9. You will now see a list of pre-built eCommerce websites. Scroll down until you find the one that suits your business. In our case, we found a pre-built eCommerce website called “Plant Shop”. Now simply click on that template.
10. A new window will open up where you will be asked to upload your logo. If you have it ready, you can upload it otherwise you can do it later. Then click on Skip & Continue button.
11. Next, you will be prompted to customize the theme color scheme and font style. Simply choose what you like and click on Continue.
12. Next, you will be asked for your personal information. There is no need to fill out the information. Click on Submit & Build My Website button to proceed. It will take around 30-50 seconds to process to complete the customization.

13. Congratulations! Your website is ready… Now you can customize it further by adding products, product categories, pages, etc.

Quick Note – As part of the starter package, WooCommerce has already been installed on your website. You simply need to configure some of the settings for your own products, categories, shipping, taxes, and payment gateway. We will cover all these details in the next section.
Now let’s take a quick look at some of the general settings that you should set before launching your online store with WordPress.
A Few Important WordPress General Settings
Here are a few important general settings that you should consider while setting up your online store.
Update Your Logo & Site Icon
You may be wondering how to update your logo. It’s actually pretty simple and only requires a few steps.
Simply go to the Appearance » Customize option in your WordPress dashboard.
Under the “Site Identity” section, you’ll see 2 options. One is for updating your site icon and another is for changing your logo. You must update both of them with your brand logo and icon.
Update your Fonts & Color Scheme
To change the fonts and colors, go to the Appearance » Customize option in your WordPress dashboard.
Under the “Global” section, you can modify the color schema and font style as per your brand preference.
Create Required Legal Pages as per Law
If you’re selling physical goods or services, then you might want to create legal pages such as Privacy Policy, Terms & Conditions, Returns Policy, Shipping Policy, etc. This way, you can ensure that your customers know about your terms and conditions.
In order to do so, go to the Pages » Add New option in your WordPress dashboard. By doing so, you can create any number of legal pages for your eCommerce website.
Now, in the next section, we will show you how to set up your Your WooCommerce Store.
Step 6: Setting Up Your Ecommerce Store
By now, you’ve successfully created an eCommerce website with WordPress by using a pre-made template from Astra.
However, you may want to customize your website further to make it more appealing to your target audience.
In addition, you’ll need to update all the WooCommerce settings to match your business requirements. This can seem like a daunting task, but never fear! We’ll walk you through each step so you can get started.
6.1 Add Your Business & Product Details
Adding your business and product details to your eCommerce platform is the first and most important step to take in order to get your store up and running.
This process will help you automate various aspects of your business, including currency, shipping, taxes, and more. By taking the time to configure all of this information correctly from the beginning, you will save yourself a lot of time and hassle down the road.
To add these details, click on the WooCommerce tab within your WordPress dashboard. You will then be redirected to the wizard page where your need to enter your store details in some easy-to-follow instructions.
First of all, you will be asked about your store location. Enter all the information accurately and then click on the “Continue” button.

Next, you will be asked to select your industry type. Choose one that best suits your business model. For example, if you sell fashion items, choose “Fashion, apparel, and accessories”. After that click on the “Continue” button.

On the next screen, you will be asked your product type. Choosing the right category for your product helps you organize your products efficiently, so pick carefully. Then click on the “Continue” button.

After that, you will be asked for some general information regarding your business. Make sure to fill out everything properly. Click on the “Continue” Button.

Next, you will be asked whether you would like to use additional business features. We recommend you, simply leave the box unchecked. Click on the “Continue”.

Finally, you will be given an option to select a theme. Make sure to pick Astra and click on the “Continue with my active theme” button.

Upon going to the next screen, you will find all WooCommerce settings in one place. You will have to configure each one step by step.
6.2 Set Up Payment Options
First of all, let’s set up the payment options for your online store. For this click on the “Set up payments” option under the Let’s get you started section.

Choose the payment method you wish to accept through your store. You can select from multiple options, such as credit cards, PayPal, Stripe, RazorPay, or bank transfers.
In case you are unable to find your desired payment method, you can click on the “See More” link to find other payment methods.

The payment setup process is very simple and straightforward. You just need to click the “Get Started” button and follow the instructions to configure your website with your desired payment method.
6.3 Configure Your Tax Rates
Now it’s time to configure your tax rates. Go back to the Let’s get you started section again and click on the “Add tax rates” option.
On the next screen, make sure to choose the option “Set up taxes manually”.

Then, you will be redirected to another page where you will see all available tax rates. Select the ones you want to apply to your store.

Quick Note – If you have any questions or concerns regarding taxes, please contact any tax expert at your local government office.
6.4 Set Up Shipping Options
Product shipping is the major factor that determines how much customers pay for their purchases. It also affects the overall performance of your eCommerce store. So, we suggest you take care of it.
Go to WooCommerce >> Settings from your WordPress dashboard’s left side menu.
On this page, you will find multiple tabs. Simply click on the “Shipping” tab to set up your shipping cost. There you just need to edit the existing Shipping zones option and then update your shipping cost.

This is a quick and easy process that only takes a few minutes to complete. After you have updated your shipping cost, be sure to click on the “Save Changes” button at the bottom of the page.
6.5 Setup Other WooCommerce Settings
You have already set up your payment options, taxes, and shipping cost, but there are still more things you need to do before you launch your online store.
Go to WooCommerce >> Settings >> Account & Privacy option from your WordPress dashboard’s right-side menu.
From here, you can customize the settings of the checkout and account creation process. These settings are important because they determine whether customers can create accounts without providing personal information or not.

6.6 Add Your Products & Categories
Adding products to your online store is the final step in getting everything up and running. Once you’ve added your products, you’ll be able to start taking orders and processing payments.
There are a few things to keep in mind when adding products to your store, such as creating clear and concise descriptions and using high-quality images.
Adding products to your store is a relatively simple process, but there are a few things you will need to do in order to get started.
Important – As you already know, you’ve designed your store using a pre-built Astra template, so before you add your products, delete all demo products and categories. This process is quite simple and only takes a few seconds. Follow the steps below to delete the demo products and categories from your store.
First, Go to the Product >> All Product in your WordPress dashboard. Then select all products and then select the “Move to Trash” option and apply.
Make sure to delete all your products from the Trash folder as well.
Second, Go to the Product >> Categories in your WordPress dashboard. Then select all product categories and then select the “Delete” option and apply.
You have successfully deleted all the demo products and categories. Now you can start adding your own products and categories.
The first thing you should do is choose the category where you want to place your products. To create your product categories, again Go back to the Product >> Categories option.
On the product category page, simply you need to add a category name, a short description, and a category image, and then click on the “Add new category” button.
You can create as many categories as you need this way.

Now you have created categories for your products, it’s time to add your products.
For this, go to Product >> Add New
Here, you can add the product title name, price, and product description. You’ll also need to upload an image of the product and select the category for your product.

Additionally, you will also find some other options at the bottom of the page, Like General, Inventory, Shipping, Link Products, Attributes, and Advanced. Make sure to fill out all required information there.

Once you’ve entered all the necessary information, click “Update” and your new product will be live on your store!
For in-depth details on setting up products and categories, you can check out this official guide from WooCommerce.
Quick Note – Adding products to your online store can be a daunting task, but with a little organization you can get it done quickly and efficiently. Start by categorizing your products into similar groups. For example, if you sell clothing, create categories for shirts, pants, skirts, etc. This will make it easier for customers to find what they’re looking for and will help you keep track of your inventory.
6.7 Personalize Your eCommerce Store Website
Personalization is one of the most important aspects of any eCommerce website. It helps users feel more comfortable while shopping, which leads them to spend more money.
In fact, personalization has been proven to increase revenue by as much as 10-15%.
Here are a few tips that can help you improve your customer experience:
1) Create a Custom Home page
Custom home pages allow visitors to browse through your entire site without having to navigate between different sections. They’re great for showcasing your best products or services, giving visitors a preview of what they can expect when they visit your store.
2) Add a Stunning Logo & Icon
A beautiful logo and icon can really set the tone for your brand. A simple yet eye-catching design can attract potential buyers and encourage them to stay longer on your site.
3) Use Social Media Buttons
Social media buttons let people share your content across social networks like Facebook, Twitter, Pinterest, LinkedIn, Google+, Instagram, and others. If you don’t already have these buttons on your website, you should consider getting them now. We recommend using the Social Snap plugin to automatically generate social sharing links on your website.
4) Include Contact Information
If you want to build trust with your audience, include contact information such as phone number, address, email, and physical location of your store. You can create a separate “Contact Us” page where you can provide additional information about your business.
5) Show Off Your Best Products
You may not always have the best products available, but you can still show off your best ones. Create a separate section for featured items and highlight them on your homepage.
6) Add All Required Legal Pages
All websites must comply with certain legal requirements. These include privacy policies, terms of use, and copyright notices. You’ll need to add these pages to your website before you start selling anything.
6.8 Testing Your Store Performace
Once you’ve finished building your website, it’s time to test its performance. Here are some things you should do to ensure your store runs smoothly:
1) Check Your Site Speed
The speed at which your website loads is extremely important. Slow loading times can cause visitors to leave your site immediately. In addition to making your site look unprofessional, slow load speeds also affect how well search engines rank your site.
To check your site speed, go to Google PageSpeed Insights and enter your URL. Then click “Check My Site” to see how fast your site loads.
2) Test Your Product Images
Your product images are another area where you can improve your conversion rate. Make sure that all of your photos are high quality and optimized for mobile devices. Also, make sure that your product images are large enough to be easily visible on small screens.
3) Optimize For Search Engines
Search engine optimization (SEO) is one of the most effective ways to drive traffic to your website. It involves optimizing your web pages so that they appear higher up in search results. The better your SEO, the more likely you will be to get new customers.
There are many tools out there that help you optimize your site. Some of our favorites include Yoast SEO and RankMath SEO.
4) Set Up Google Analytics
Google Analytics is a free tool that allows you to track visitor behavior on your site. This includes how long visitors spend on each page, what keywords they used to find your site, and whether they clicked any of your ads.
Analytics helps you understand who your target market is and what they’re looking for when they visit your site. It also lets you know if your marketing efforts are working or not.
5) Site Structure
Having a clear structure makes it easier for users to navigate through your site. A good rule of thumb is to keep your navigation bar simple and easy to use. So make sure that your menu has only three to five main categories.
Also, consider adding sub-categories to your main categories. This way, users don’t have to scroll down to find specific products.
Congratulations!
Now your online store is ready to go. You can start selling right away!
But wait this is not the end of this post, here is a bonus for you.
We have created a special section about your online store promotion. So whether you’re just getting started or looking for new ways to boost your traffic, be sure to check it out!
Promoting Your Online Store (Bonus Tips)
There are countless ways to promote your online store, but it can be tough to know where to start. To make things easier, we’ve put together a list of our top tips for promoting your store.
1 SEO (Search Engine Optimization)
If you want to rank highly in search results, then you need to optimize your site for search engines like Google, Bing, Yahoo, etc. There are two types of SEO: Onsite SEO and Offsite SEO.
Onsite SEO refers to improving your site’s content and design. Offsite SEO focuses on building links from other websites back to yours. Both are equally important.
You should always try to do both. But if you’re struggling with either, you can hire someone to help you.
2 Social Media Marketing
Social media marketing is one of the best ways to promote your business online. But before you jump into social media marketing, it’s important to first set up a strategy.
Here are some steps you can take:
Set goals – What exactly would you like to achieve? Do you want to increase brand awareness, generate leads, sell more products, etc.?
Define your audience – Who are you targeting? Are you aiming at local businesses or global brands?
Determine your budget – How much money will you invest in social media marketing?
Choose a platform – Which platforms will work best for your business? Facebook, Twitter, Instagram, LinkedIn, Pinterest, YouTube, etc.?
Once you’ve decided which platforms to focus on, write down all the tasks needed to complete your campaign. Include everything from posting product offers to monitor comments and responding to them.
You can now get started with your social media marketing campaigns. Just remember to stay consistent and focused so you can see real results.
3 Email Marketing
Email marketing is another great way to promote your online store. It’s also a powerful tool for generating sales and leads.
To get started, you’ll need to choose a service provider. There are many email marketing services available today, including MailChimp, Constant Contact, and others.
The key thing to remember when choosing a service provider is to pick one that works best for your needs. Some providers offer free trials while others charge monthly fees.
Before signing up for any service, read their terms and conditions carefully. You don’t want to end up paying extra charges if you didn’t agree to them.
After selecting a service provider, you’ll need to decide what kind of emails you’d like to send. For example, you could send regular newsletters or promotional messages.
Finally, you’ll need to determine how often you plan to send these emails. The frequency depends on your target market.
If you’re sending emails to a large number of people, you may want to send them once every week. On the other hand, if you’re trying to reach out to a smaller group of clients, you may only want to send them once per month.
It’s also important to note that email marketing isn’t just limited to promoting your business. You can use it to communicate with existing customers, answer questions about your products, and provide valuable information.
4 Content Marketing
Content marketing is a type of marketing that involves creating content (e.g., blogs, videos, infographics) and then sharing this content across various channels.
This allows you to create high-quality content that attracts visitors to your site. Once they visit your website, they have the opportunity to learn more about your company and purchase your products.
There are two main types of content marketing:
1. Inbound marketing – This refers to content that helps drive traffic to your website. Examples include blog posts, eBooks, white papers, case studies, webinars, etc.
2. Outbound marketing – This refers specifically to content that encourages users to share your content with others. Examples include tweets, Facebook updates, Google+ posts, etc.
In order to successfully implement content marketing, you first need to identify your audience. Who do you want to attract? What will be most beneficial to them?
Next, you should think about the type of content you’d like to produce. Do you want to publish articles, podcasts, or video tutorials?
Once you know what kind of content your audience would find useful, you can start developing it.
You can either write the content yourself or hire someone else to do it for you. If you hire someone, make sure they understand your goals before assigning them a project.
5 PPC Advertising
Pay Per Click (PPC) advertising is another way to promote your business online. It’s similar to SEO because both involve using keywords to increase visibility. However, unlike SEO, which focuses on organic search results, PPC advertising targets paid keywords.
When someone searches for a specific keyword, your ad appears at the top of the page. When they click on your ad, they land on your website where they have the chance to learn more about your product or services.
The goal of PPC ads is to generate leads. So, when choosing keywords, focus on those that are relevant to your industry and potential customers.
FAQ On How to Build eCommerce Website
Final Conclusion – How to Start an eCommerce Website
If you are planning to start your online store, and looking for ways to build your store quickly and easily, then look no further than WordPress.
With over 450 million active users worldwide, WordPress has become the go-to platform for building sites. Plus, if you already have a website that you would like to convert into an eCommerce store, you can do so by simply installing the WooCommerce plugin.
In this post, we have discussed everything that you need to know about building an online store. We hope that our guide helps you get started with your new venture.
If you have any questions, feel free to leave a comment below! We will be happy to help you out.

Hi,
Such a detailed guide that I have never seen, you have covered all the basic and advanced points that are required to launch a successful online store.
Thanks for sharing a comprehensive tutorial.
Thanks & Regards,
Thank you for taking the time to provide feedback on this guide. We’re glad to hear that you enjoyed it..🙂